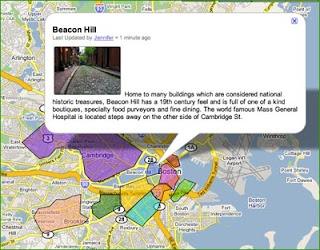
 Since I'm currently working on 3 different sites that require working with Google's map feature, I've had a chance to find a few quirks in their map interface. After trying to use their instructions to insert images into a map marker pop up, I found a few workarounds.
This quick tutorial assumes three things: 1) That you have a Google account. 2) That you have a map already created and saved into your "My Maps" on Google. 3) That you have set up a Google Picasa account.
I also recommend using a browsing program that allows you to open up multiple tabs since you will need to click back and forth between tabs.
The Google Picasa/Map method:
Step 1: In your image editing program, create an image that is at least 144 pixels wide.
Save on your computer as a jpg image. Make a note of its measurements in pixels for Step 8.
Step 2: On the web, go to your Google account and on the home page, go to More>Photos. On your Picasa page, select New Album on the right.
Step 3: Upload your jpg image. Then go back to your album and click on the image. After the image loads into its own page, you will see a link entitled "link to this image" in the 4th box down on the right. Click on it.
Step 4: Choose the "HTML to embed in website" option by clicking in the text box. This will highlight the code. Go to the top toolbar in your browser and under Edit click Copy.
Step 5: Now open a new tab in your browser (File>New Tab), and go to your Google homepage again. Click on Maps in the upper left corner of the page. Once that page opens, go to My Maps and select the map that you have created and saved.
Step 6: Once the map you want to work on is loaded into the window on the right, Click on the Edit button. This will enable you to make changes to your map. With your map in Edit mode, click on an area or marker to edit its contents.(see image below for example)
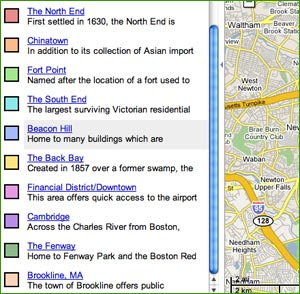
Step 7: Here's the fun part! Switch to edit HTML and click at the top of the window to place the cursor there. Then, go to the top toolbar again and hit Edit > Paste. This will paste the URL that you copied from your Picasa page. You actually only need part of the pasted code. You will need to find the part that says img src= and delete the code that comes before it.(see the example code below for this and the next step)
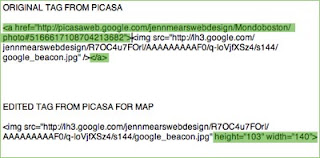
Step 8: After you have deleted the a href tag, go to the end of the pasted code and delete the closing tag. (). Then, directly after the URL of the image in the remaining code, but before the closing bracket (>), type: width=(width in pixels)px height=(height in pixels)px. (see image below)
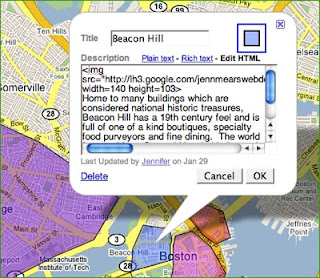
Step 9: Click Save on the left, and then click on the marker or area again. Check to make sure everything is OK by switching to the Rich Text choice in the pop-up window.
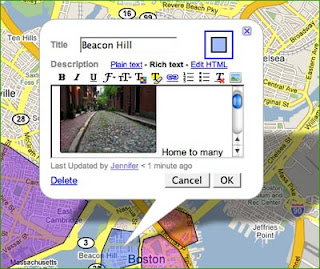
If everything looks OK, click Done.
Note: if it doesn't look right at first, make sure the code for the image reads img src="url for image" and then the width and height.


No comments:
Post a Comment